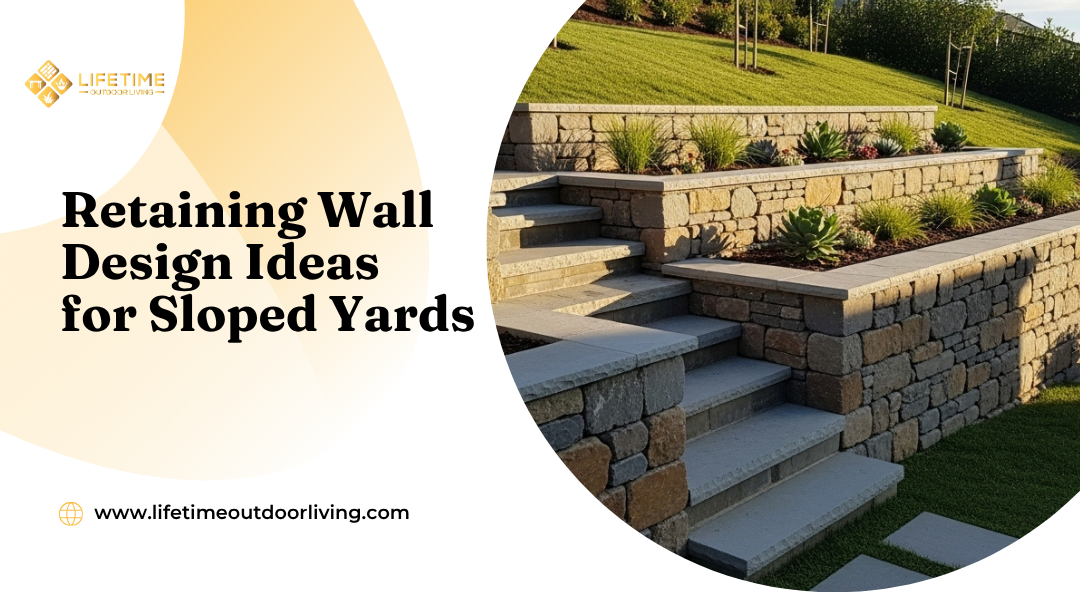
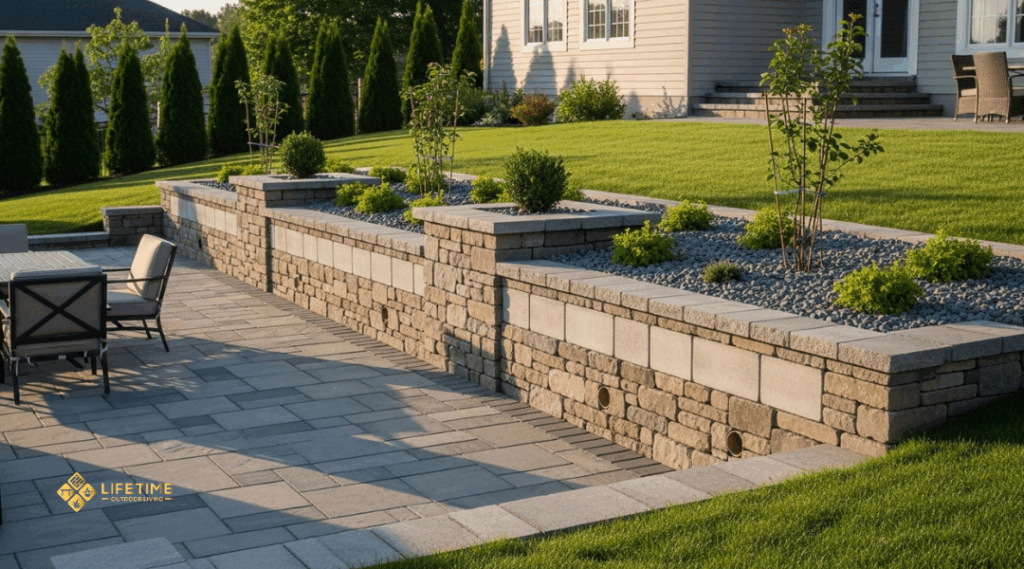
A sloped yard can feel like wasted space, but the right retaining wall design turns it into a functional, attractive part of your landscape. A well-planned retaining wall stabilizes soil, creates usable terraces, and adds structure that blends seamlessly with your outdoor design. Whether your goal is to carve out a level patio, plant a terraced garden, or reduce erosion, thoughtful design choices make all the difference.
You’ll explore how retaining walls transform steep or uneven ground into inviting, multi-purpose areas that enhance both form and function. From understanding slope types and drainage fundamentals to selecting materials such as natural stone, concrete, or timber, each decision affects the wall’s durability and appearance.
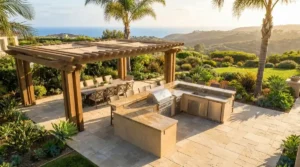
Lifetime Outdoor Living specializes in designing and building these solutions across Orange County, combining craftsmanship with practical engineering. Their approach helps you create a stable, low-maintenance landscape that complements your home’s style while maximizing every inch of your property.
How Retaining Walls Turn Slopes Into Usable Space
Retaining walls let you reclaim steep or uneven ground by holding soil in place and shaping level areas for planting, seating, or pathways. They also help manage drainage and reduce erosion, allowing you to make the most of your property’s natural grade.
Benefits: Erosion Control, Flat Zones, Safer Access
A well‑built retaining wall prevents soil erosion by holding back loose earth and redirecting runoff. This keeps your yard stable after heavy rain and limits sediment buildup around structures.
By cutting into or building up sections of the slope, you can create flat zones for patios, lawns, or garden beds. These level surfaces make outdoor spaces more functional and easier to maintain.
Retaining walls also improve access and safety. Adding steps or terraced levels reduces the steepness of the terrain, making it simpler to move between elevations. Materials like stone, concrete block, or timber can match your landscape style while providing reliable structural support.
| Feature | Purpose | Example Use |
|---|---|---|
| Drainage Layer | Prevents water buildup | Gravel backfill behind wall |
| Terraced Levels | Adds usable space | Garden beds or seating areas |
| Reinforcement | Increases stability | Geogrid or rebar in tall walls |
Reading Your Slope: Grade, Soils, Water Paths
Before building, you need to understand how your slope behaves. Measure the grade to determine how steep it is—gentle slopes may need short walls, while sharp inclines often require multiple tiers.
Evaluate soil type because clay, sand, and loam each drain and compact differently. Clay holds water and increases pressure behind the wall, while sandy soils drain quickly but may need stronger reinforcement.
Study water paths during rainfall or irrigation. Identifying where water flows helps you plan drainage outlets like perforated pipes or gravel trenches. This prevents hydrostatic pressure that can damage the wall and ensures your retaining structure lasts longer while keeping your new usable space stable.
Planning And Safety Basics
Proper planning ensures your retaining wall remains stable, drains correctly, and meets safety and legal requirements. You need to evaluate the ground conditions, understand design limits, and confirm that your project complies with local building codes before construction begins.
Site Assessment: Soil Type, Surcharge, Utilities
Start by identifying your soil type. Clay holds water and exerts more pressure, while sandy or gravel soils drain better but may shift more easily. A soil test helps determine bearing capacity and drainage needs.
Account for surcharge loads—extra weight from driveways, patios, or slopes above the wall. These forces increase lateral pressure and may require stronger materials or deeper footings.
Locate underground utilities before digging. Contact local utility services to mark gas, water, and electrical lines. This prevents damage and ensures compliance with safety regulations.
Use this checklist before design:
- Soil classification and drainage rate
- Nearby trees or roots that affect stability
- Distance from existing structures or slopes
- Location of buried lines and easements
Height Thresholds And When To Hire An Engineer
Walls under about 4 feet (1.2 meters) can often be built using modular blocks or timber with basic reinforcement. Taller or terraced walls require engineering design to handle added soil pressure and water load.
If your wall supports a driveway, structure, or steep grade, a licensed structural or geotechnical engineer should review the plan. They can specify footing depth, wall thickness, and reinforcement type.
Professional installation becomes critical when:
- The wall exceeds local height limits
- Drainage or backfill conditions are complex
- You need to integrate stairs, lighting, or fencing
Hiring a professional ensures the design meets both safety and performance standards, reducing the risk of failure or costly repairs later.
Permits And Local Code Requirements
Most municipalities require permits for retaining walls above a specific height, often between 3 and 4 feet. Some areas also regulate materials, setbacks, and drainage systems to prevent runoff onto neighboring properties.
Check your local building department for exact thresholds and submittal requirements. You may need stamped drawings from an engineer or proof of soil stability.
Follow zoning and property line rules carefully. Building too close to a boundary can lead to disputes or fines. Keeping documentation of approvals and inspections protects you if issues arise later.
When in doubt, consult your local authority before starting construction to ensure your retaining wall meets all legal and safety standards.
Design Approaches By Slope Type
Different slope conditions call for distinct retaining wall strategies that balance stability, drainage, and usability. The right approach depends on grade steepness, soil composition, and how you plan to use the outdoor space.
Single Wall Solutions For Gentle Grades
For mild slopes or gradual inclines, a single retaining wall usually provides enough support to manage soil movement and define usable areas. You can build it from concrete blocks, natural stone, or treated timber, depending on the desired look and budget.
Keep the wall height under 4 feet when possible. This reduces structural pressure and often eliminates the need for engineering permits. A drainage layer behind the wall—such as gravel and perforated pipe—helps prevent hydrostatic buildup and extends wall life.
You can integrate planter beds or a built-in bench along the wall to add function. In a sloped backyard, this approach works well for creating a level patio, pathway edge, or garden border without major excavation.
| Slope Type | Recommended Wall Height | Common Materials | Key Benefit |
|---|---|---|---|
| Gentle (under 10%) | ≤ 4 ft | Stone, block, timber | Simple installation, low cost |
Tiered Terraces For Steep Yards
When the grade becomes too steep for a single wall, tiered retaining walls divide the slope into smaller, manageable levels. Each terrace acts as its own mini yard, reducing soil pressure and improving drainage between levels.
You can design terraces for different uses—such as planting beds, seating zones, or pathways. Keeping each wall under 3 to 4 feet helps maintain stability and visual balance. Use geogrid reinforcement or interlocking block systems for added strength on steep slopes.
Planting low-maintenance ground covers or shrubs on each level helps control erosion and soften hard edges. Tiered terraces turn a challenging sloped yard into a multi-level garden wall system that increases accessibility and outdoor living space.
Cut And Fill Combos With Berms And Swales
For large or irregular slopes, combining cut and fill techniques with berms and swales can create a natural-looking landscape that manages water flow effectively. You cut into the hill to form level areas and use the excavated soil to build berms downslope.
Retaining walls reinforce the cut sections, while swales—shallow, grass-lined channels—direct runoff safely away from structures. This method reduces erosion and integrates stormwater management into the design.
You can pair low retaining walls with planted berms to blend the structure into the terrain. This approach suits expansive sloped yards where you want both functional drainage and a visually cohesive landscape.
Material Options And Visual Styles
Selecting the right materials determines how well your retaining wall performs and how it fits into your landscape. Each option offers distinct structural benefits, textural qualities, and maintenance needs that influence both durability and appearance.
Modular Block Systems And Textures
You can build efficient retaining walls using interlocking concrete blocks, which lock together without mortar. These modular systems simplify installation and allow for consistent alignment on sloped terrain. Many come with built-in drainage channels that reduce hydrostatic pressure behind the wall.
Surface finishes vary widely, from smooth architectural blocks to split-face textures that mimic natural stone. Some systems include corner and cap units for a finished edge. You can also mix block colors or patterns to match nearby hardscaping.
Because modular blocks are manufactured to uniform sizes, they create a clean, geometric look. They work well for terraced yards, garden borders, or modern landscapes where precision and stability matter most.
Natural Stone: Dry Stack Vs Mortared
Natural stone retaining walls blend easily with surrounding vegetation and terrain. You can use limestone, granite, or sandstone depending on local availability and desired color tone. Each stone type has a distinct texture and weathering pattern that adds character over time.
A dry stack wall uses gravity and friction to hold stones in place without mortar. It allows water to drain naturally through gaps, reducing pressure buildup. This method suits low to mid-height walls and informal garden settings.
A mortared wall, by contrast, uses cement to lock stones together. It provides greater structural strength for taller walls but requires weep holes or drainage systems. To achieve a natural look, vary stone sizes and stagger joints for a stable and visually balanced layout.
Poured Concrete And Board Formed Finishes
Poured concrete walls deliver strong, continuous support for steep slopes or heavy loads. You can shape them into curves or linear forms, making them versatile for both residential and commercial landscapes. Reinforcing steel adds structural integrity and extends lifespan.
For visual interest, board formed concrete replicates the texture of wood grain by casting the concrete against rough planks. This technique softens the industrial look and pairs well with natural materials like stone or timber.
Concrete can also serve as a base for gabion walls, where wire baskets filled with rocks are stacked in front for both aesthetic and functional purposes. Regular sealing helps protect against moisture and surface staining.
Timber And Steel Accents
Timber retaining walls offer a warm, natural appearance that complements rustic or wooded settings. Pressure-treated lumber or hardwood species resist decay better than untreated wood. You can step the wall to follow the slope and integrate planters or seating.
Steel accents, such as edging plates or retaining panels, provide a modern contrast to softer materials. Weathering steel (Corten) develops a stable rust-like patina that resists corrosion while adding texture and color variation.
Combining timber with steel supports increases strength and reduces long-term warping. This hybrid approach works well for smaller retaining structures where you want both natural warmth and structural precision.
Functional Add Ons That Expand Use
Adding practical elements to a retaining wall can make a sloped yard safer, easier to navigate, and more enjoyable to use. These features help connect different levels, create comfortable gathering areas, and improve accessibility without detracting from the landscape design.
Integrated Steps And Landings
Integrated steps and landings make movement between elevation changes more natural. You can build stone steps or concrete treads directly into the retaining wall, blending structure and function. This approach avoids the need for separate stairways that interrupt the yard’s layout.
Use wide landings to create resting points or small viewing platforms. They also help manage water runoff by breaking up long slopes. Materials such as flagstone, timber, or poured concrete can match or contrast with the wall for visual consistency.
For safety, keep riser heights uniform and include non-slip surfaces. If the wall borders a garden or patio, integrate lighting along the steps for evening visibility. This design choice increases usability while maintaining a clean, cohesive look throughout your outdoor space.
Built In Seating And Planter Walls
Retaining walls can double as built-in seating, offering a practical way to use vertical space. A stone bench or capped wall edge provides a sturdy seat that defines a seating area near a fire pit or outdoor dining zone.
Adding planter walls softens the structure and introduces greenery at eye level. You can design alternating sections of seating and planting to balance comfort and aesthetics. Use durable materials like stone or concrete block to handle soil pressure and seating weight.
Include drainage layers behind planter sections to prevent water buildup. For comfort, top seating surfaces with smooth coping stones or wood caps. This combination of planting and sitting areas makes the yard more inviting while reducing the need for additional furniture.
Railings And Child Safe Edges
When a retaining wall borders a patio, deck, or drop-off, railings and child-safe edges are essential. These safety features define boundaries and prevent falls without compromising style.
Choose railing materials that coordinate with the wall—metal, wood, or glass panels all work depending on the setting. Keep railing height consistent with local building codes for safety compliance.
For lower walls, use rounded coping stones or raised planting strips as protective edges. These provide a visual and physical barrier while maintaining a natural appearance. Incorporating these details ensures your sloped yard remains both functional and secure for all users.
Drainage, Footings, And Longevity
A retaining wall’s durability depends on how well you manage water, prepare the base, and plan for seasonal and environmental stresses. You maintain structural integrity by combining proper drainage, compacted footing materials, and construction details that limit soil pressure and frost damage.
Base Prep, Geogrid, And Proper Setback
Start with a level, compacted base of crushed stone or gravel that extends beyond the wall’s width. This layer distributes loads evenly and prevents settlement. Avoid soft or organic soils that can compress or shift under pressure.
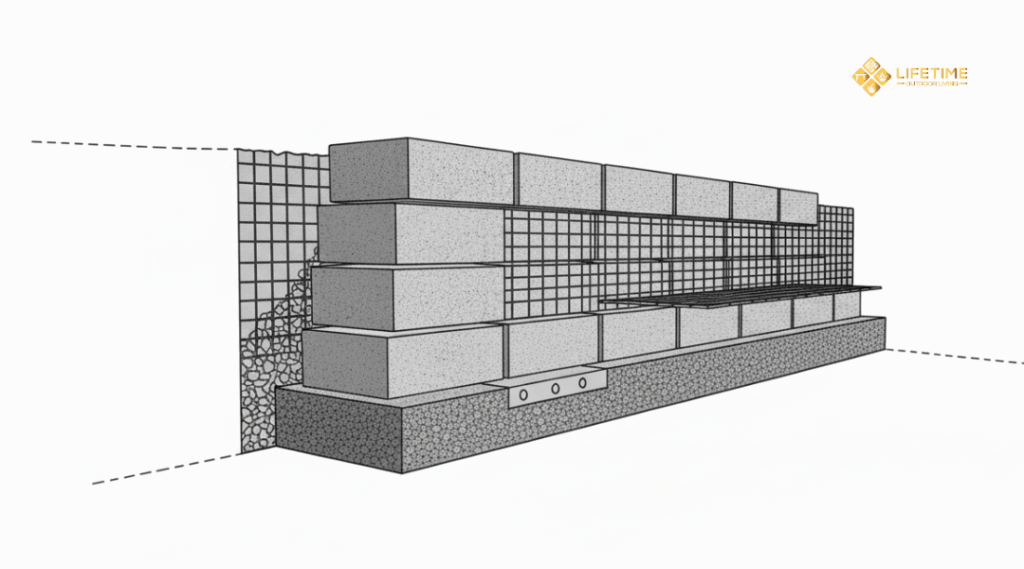
Set the first course of blocks below grade for stability. Maintain a setback (batter) of about 1 inch per foot of height for gravity or segmental retaining walls. This backward lean improves resistance to soil pressure.
Use geogrid reinforcement for taller walls or poor soil conditions. Geogrid layers extend into the retained soil, forming a composite mass that resists sliding and overturning. Follow manufacturer spacing and embedment lengths—typically 60–80% of the wall height—to ensure proper load transfer.
Check alignment and level frequently. Small errors at the base multiply with height, affecting both appearance and performance.
French Drains, Weep Holes, And Clean Backfill
Water buildup behind a wall is the most common cause of failure. Install a French drain or perforated pipe at the base to collect and redirect water away from the structure. Slope the pipe slightly, about 1%, toward an outlet or daylight discharge.
Place clean, free-draining backfill—such as angular crushed stone—directly behind the wall. Avoid clay or fine soils that trap moisture. A non-woven geotextile fabric between native soil and drainage aggregate prevents clogging while allowing water to pass through.
For solid concrete or masonry walls, add weep holes spaced every few feet to relieve hydrostatic pressure. Keep outlets screened and clear of debris. Regularly inspect drainage paths to ensure they remain open, especially after heavy rain or freezing conditions.
Root Pressure, Freeze Thaw, And Maintenance
Tree roots and frost cycles can shift or crack retaining walls over time. Keep large vegetation at least several feet from the wall to prevent root pressure from displacing blocks or lifting footings. Choose groundcover or shallow-rooted plants for nearby landscaping.
In cold climates, account for freeze–thaw expansion. Proper drainage and free-draining backfill reduce trapped water that can freeze and exert pressure. Ensure the footing extends below the local frost depth or use insulation where necessary.
Inspect the wall annually for bulging, cracks, or clogged outlets. Clear sediment from drains, replace damaged blocks, and maintain vegetation. Consistent upkeep extends the wall’s service life and preserves its structural integrity for decades.
Terraced Garden Concepts
Designing terraced gardens on a slope helps you manage erosion while turning vertical space into productive and attractive planting areas. Each level can serve a specific purpose—supporting food crops, sustaining pollinators, or conserving water through efficient planting and irrigation practices.
Edible Beds And Pollinator Tiers
You can use terraced levels to separate edible crops from ornamental or pollinator-friendly plants. The upper tiers often receive more sunlight, making them ideal for vegetables, herbs, and fruiting shrubs. Lower levels stay cooler and can host leafy greens or shade-tolerant herbs.
Include planting pockets within retaining walls for strawberries, creeping thyme, or trailing herbs. These soften the wall face and make harvesting easier. Integrating pollinator tiers—zones with flowering perennials like lavender, salvia, or coneflower—supports bees and butterflies while improving biodiversity.
Keep soil depth consistent across each bed to ensure even root growth. A simple layout might include:
| Tier | Function | Example Plants |
|---|---|---|
| Top | Sun-loving edibles | Tomatoes, basil, thyme |
| Middle | Pollinator support | Lavender, bee balm |
| Bottom | Cool-weather crops | Lettuce, parsley |
Drought Smart Planting For Sun And Shade
Terraced slopes often experience uneven moisture and sun exposure. Choose succulents, ornamental grasses, and drought-tolerant herbs for upper, sun-exposed levels. In shaded or lower areas, use moisture-holding plants such as ferns, hostas, or creeping thyme.
Mulch each garden bed to reduce evaporation and stabilize soil temperature. Drip emitters or soaker hoses placed under mulch deliver water directly to roots, improving efficiency.
Group plants by water needs to prevent over- or under-watering. For example, rosemary and sedum thrive together in dry zones, while mint and chives prefer slightly damp soil. This zoning approach reduces maintenance and keeps terraces healthy through seasonal changes.
Irrigation Routing And Service Access
Plan irrigation before building retaining walls. Install conduits or sleeves through each wall to route irrigation tubing between terraces. This prevents exposed hoses and simplifies maintenance later.
You can run irrigation lines along the back of each planting bed, connecting them to a central manifold or timer. Leave narrow access paths or stepping stones for servicing emitters and trimming plants.
When designing service access, maintain at least 18 inches of clearance behind or beside each wall. This space allows you to inspect drainage outlets, adjust watering systems, and replant as needed without disturbing the structure.
Aesthetic Themes And Finishes
Retaining walls can do more than control erosion—they also shape the visual identity of your outdoor space. The finish, texture, and lighting you choose influence how the wall integrates with your home’s architecture and the surrounding landscape design.
Modern Linear Walls With Smooth Caps
Clean lines and uniform materials define a modern retaining wall. You often see poured concrete, concrete block, or large-format stone veneer finished with smooth caps for a polished edge. The goal is to create a structure that feels intentional and connected to contemporary architecture.
Smooth caps, usually made of precast concrete or cut stone, provide a crisp top line that doubles as a seating surface. This detail keeps the wall functional and visually balanced.
To maintain a cohesive look, use a neutral color palette—gray, charcoal, or beige tones work well with minimalist landscaping. Pair the wall with geometric planters, linear pathways, or low ornamental grasses to reinforce the modern aesthetic.
| Material | Typical Finish | Best For |
|---|---|---|
| Poured Concrete | Smooth or polished | Urban, minimalist yards |
| CMU Block with Stucco | Fine-textured | Contemporary homes |
| Stone Veneer | Flat-cut | Transitional designs |
Rustic Split Face And Mixed Stone
Rustic walls rely on texture and variation. Split-face stone, fieldstone, or a mix of rock sizes creates a natural appearance that blends into sloped terrain. The uneven surface catches light differently throughout the day, adding depth and visual interest.
You can use local stone to connect the wall to its environment and reduce transport costs. Mixing stones—granite, limestone, and sandstone—adds subtle color shifts that look organic rather than engineered.
Dry-stacked construction, where stones are laid without visible mortar, enhances the traditional feel. Pair this finish with native plantings and irregular flagstone paths for a cohesive landscape design that feels grounded and timeless.
Maintenance is minimal beyond occasional joint repair or vegetation trimming, making it practical for large or multi-tiered slopes.
Mediterranean Stucco With Tile Caps
Mediterranean-style retaining walls bring warmth and texture through stucco finishes in soft earth tones such as cream, sand, or terracotta. The smooth surface reflects light, brightening shaded slopes and complementing clay roof tiles or arched architecture.
Tile caps—often ceramic, terracotta, or glazed porcelain—add color and protect the top edge from moisture. This combination suits homes with Spanish, Italian, or coastal influences where outdoor living spaces connect seamlessly with patios and courtyards.
You can integrate curved profiles or arched niches into the wall to soften transitions between elevations. Plant lavender, rosemary, or olive shrubs along the base to reinforce the Mediterranean character and create a cohesive, low-maintenance landscape.
Lighting Ideas: Step, Wall, And Uplights
Lighting enhances both safety and aesthetics on sloped yards. Step lights built into risers or retaining wall faces help guide movement after dark. Recessed wall lights create subtle, even illumination without glare.
For accent lighting, use uplights to highlight stone texture, trees, or vertical surfaces. This technique adds depth and defines the wall’s structure at night.
Choose LED fixtures rated for outdoor use with warm color temperatures around 2700–3000K for a natural look. Position wiring discreetly behind caps or within conduits to maintain a clean finish.
A well-planned lighting layout supports both function and design, ensuring that your retaining wall remains a visual feature even after sunset.
Small Yard Solutions
Efficient retaining wall design in a small yard depends on using every inch of space for more than one purpose. You can integrate seating, shape circulation paths, and handle tight corners with materials and layouts that balance structure and comfort.
Short Seat Walls That Double As Furniture
A short retaining wall, around 18–20 inches high, can serve as both a soil barrier and a seating surface. This approach saves space by eliminating the need for separate benches or chairs.
You can top the wall with a smooth stone or concrete cap to make it comfortable and easy to clean. Materials like stacked stone or board-formed concrete offer durability and a clean appearance that fits compact outdoor settings.
If you plan to use the wall for seating, ensure it has a stable footing and reinforced base to handle weight. Adding low planting beds behind the wall softens the structure and keeps the area inviting.
| Height | Function | Recommended Cap Material |
|---|---|---|
| 18–20 in | Seating + Retaining | Stone, Concrete, or Brick |
Curved Layouts To Open Circulation
A curved retaining wall helps you guide movement naturally through a small yard. Unlike straight runs, curved retaining walls create softer transitions and can make a narrow space feel wider.
This layout also improves drainage by following the land’s contour rather than cutting against it. You can build gentle arcs with fieldstone or modular concrete blocks, which allow small adjustments during installation.
Use curves to define zones—such as a dining area or planting bed—without adding barriers that interrupt flow. In tight spaces, a curved wall can double as both boundary and seating, reducing clutter while maintaining structure.
Corner Treatments And Tight Access Builds
Corners and narrow access points often complicate wall construction. You can solve this by using short, segmented walls that meet at shallow angles rather than sharp 90-degree joints. This reduces pressure buildup and simplifies drainage.
Where access for large machinery is limited, lightweight materials like timber, small modular blocks, or dry-stacked stone make installation easier. These can be carried and assembled by hand.
Keep corners functional by integrating built-in planters or lighting. This approach enhances visibility and makes confined areas feel intentional rather than leftover.
Budget, Phasing, And ROI
Building a retaining wall on a slope requires balancing cost, timing, and future value. Material selection, site access, and long-term maintenance affect the total investment and potential return when selling your property. Careful planning helps you manage expenses while improving both function and visual appeal.
Cost Drivers: Height, Material, Access, Drainage
Retaining wall costs depend primarily on height, material, and site conditions. Taller walls require deeper footings, more reinforcement, and sometimes engineering review, which increases labor and material expenses.
Common materials vary widely in price:
| Material Type | Typical Cost per sq. ft. (installed) | Notes |
|---|---|---|
| Concrete block | $20–$45 | Durable, uniform appearance |
| Natural stone | $30–$60 | High-end look, labor-intensive |
| Timber | $15–$30 | Lower cost, shorter lifespan |
| Gabion or metal | $25–$50 | Modern style, moderate durability |
Limited access for machinery raises labor time and delivery costs. Proper drainage—such as gravel backfill, perforated pipe, and weep holes—is essential to prevent pressure buildup and wall failure. Skipping drainage often leads to costly repairs later.
Phasing A Multi Tier Project Over Seasons
If your slope requires several retaining walls or terraces, phasing the work can spread costs and reduce disruption. You can build the lowest or most critical wall first, then add upper tiers in later seasons.
Start by stabilizing soil and installing drainage on the initial level. This protects the site and allows you to plan irrigation and planting zones around completed sections.
During off-seasons, finalize design adjustments, source materials, and secure permits for the next phase. This approach helps maintain consistent quality while keeping the project aligned with your budget and weather conditions.
Resale Impact And Curb Appeal Wins
A well-built retaining wall improves property usability, adds visual structure, and signals good maintenance to potential buyers. Tiered gardens, built-in seating, or integrated lighting can make the yard appear larger and more functional.
Buyers often value low-maintenance materials like stone or concrete that show longevity. Even modest walls can raise perceived value when they create usable flat space or define outdoor living areas.
Professional installation, neat finishes, and cohesive landscaping typically yield stronger return on investment (ROI) than purely decorative builds. In many markets, functional retaining walls can recover a significant portion of their cost through higher resale appeal.
Eco Friendly And Low Impact Choices
Sustainable retaining wall design reduces strain on natural resources while improving drainage and supporting local ecosystems. You can build durable structures that manage erosion effectively without sacrificing environmental responsibility or long-term performance.
Permeable Backfill And Rain Capture
Using permeable backfill materials helps water drain naturally instead of pooling behind the wall. Crushed stone, gravel, or coarse sand allow rainwater to filter through, reducing hydrostatic pressure and extending the wall’s lifespan.
You can also integrate rain capture systems such as perforated drainpipes or small cisterns. These collect runoff for reuse in irrigation, minimizing water waste.
| Material Type | Function | Benefit |
|---|---|---|
| Crushed stone | Improves drainage | Reduces wall pressure |
| Gravel | Filters runoff | Prevents erosion |
| Drain tile | Channels water | Enables reuse |
Combining permeable backfill with controlled drainage keeps soil stable and supports sustainable water management.
Reclaimed Stone And Recycled Content Blocks
Choosing reclaimed stone or recycled concrete blocks reduces the need for new quarrying and manufacturing. These materials often come from demolition sites or surplus construction stock, lowering embodied carbon and waste.
Reclaimed stone offers a naturally aged look that blends well with surrounding landscapes. Recycled concrete blocks, often made with fly ash or crushed aggregate, provide consistent strength while conserving resources.
When selecting materials, confirm that they meet structural requirements and local building codes. Using locally sourced reclaimed materials further cuts transport emissions and supports regional suppliers.
Habitat Friendly Planting Between Tiers
Planting between retaining wall tiers helps create small habitats for insects, birds, and native pollinators. You can use native ground covers, grasses, and low-root perennials that stabilize soil while promoting biodiversity.
Avoid invasive species that crowd out local plants. Instead, mix flowering varieties that bloom at different times of year to maintain continuous habitat value.
Examples of suitable plants:
- Creeping thyme (Thymus serpyllum)
- Blue fescue (Festuca glauca)
- California poppy (Eschscholzia californica)
Adding vegetation between tiers not only softens the wall’s appearance but also improves soil health and supports natural drainage patterns.
Common Mistakes And How To Avoid Them
Designing a retaining wall on a slope requires attention to how water, soil pressure, and plant roots interact with the structure. Small oversights in drainage, reinforcement, or landscaping choices can cause early failure, costly repairs, or safety issues.
Skipping Drainage Or Geogrid Reinforcement
Water pressure is one of the main causes of wall movement and collapse. Without proper drainage, water builds up behind the wall, increasing lateral pressure and loosening backfill. You should always include drainage pipes, gravel backfill, and weep holes to allow water to escape.
Geogrid reinforcement is equally important, especially for taller walls or those holding heavy soil. This mesh material ties the retained soil to the wall, improving stability.
When you skip geogrid, the wall relies only on its weight, which often isn’t enough to resist long-term soil pressure.
Checklist for stability:
- Use perforated drainpipes at the base.
- Compact backfill in layers.
- Install geogrid at specified intervals based on wall height and soil type.
Proper drainage and reinforcement extend the life of your wall and reduce maintenance.
Overloading Walls With Surcharges
A surcharge is any extra load placed above or near the wall, such as a driveway, patio, or parked vehicle. These loads increase pressure on the structure beyond what it was designed to handle. You should plan for these forces during design, not after construction.
If you intend to place heavy objects or structures near the wall, consult an engineer to calculate the required wall thickness, footing size, and reinforcement spacing.
Even small additions like garden sheds or large planters can alter how the wall performs.
Avoid overloading by:
- Keeping heavy loads at least a few feet from the wall edge.
- Using proper reinforcement for known surcharges.
- Avoiding unexpected grading changes that add soil weight.
Accounting for surcharges during design helps prevent leaning, cracking, or complete failure.
Plant Choices That Undermine Structure
Plant roots can either stabilize or damage your retaining wall. Deep or aggressive root systems—such as those from bamboo, willow, or large shrubs—can push into joints and displace blocks. Over time, this pressure weakens the wall and disrupts drainage paths.
Choose plants with shallow, non-invasive roots, such as ornamental grasses or low-growing groundcovers. These species control erosion without compromising structure.
Avoid planting trees directly above or behind the wall, where roots seek moisture near the drainage zone.
Better planting practices:
- Use root barriers where needed.
- Maintain at least 2–3 feet between large plants and the wall.
- Regularly inspect for root intrusion or drainage blockage.
Thoughtful plant selection keeps your retaining wall both stable and visually appealing.
Quick Design Process Checklist
Successful retaining wall projects depend on accurate measurements, realistic budgets, and clear sequencing. You ensure durability and visual consistency by testing materials on-site and planning for long-term maintenance from the start.
Measure, Concept Sketch, And Budget Guardrails
Start by measuring the slope’s height, run, and grade angle using a laser level or string line. Record these numbers to calculate wall height, drainage needs, and material volume. Small errors in measurement can lead to costly structural issues later.
Create a scaled concept sketch that includes wall placement, terraces, stairs, and planting zones. Use this drawing to visualize transitions between levels and confirm access for equipment.
Set budget guardrails early. Include costs for excavation, base material, drainage pipe, filter fabric, wall blocks or stone, and labor. Add a 10–15% contingency for unexpected soil conditions or delivery delays. This helps you stay within financial limits while allowing flexibility for design adjustments.
Material Samples And On Site Mockups
Gather physical samples of your chosen materials—stone, concrete block, timber, or gabion fill. Compare their color, texture, and size against existing hardscape and vegetation to confirm compatibility. Place them in natural light at different times of day to evaluate tone consistency.
Build a small on-site mockup section, ideally one to two feet high. This helps you confirm joint spacing, drainage alignment, and wall batter (the backward lean). Check how the materials handle moisture and temperature changes over several days.
Use a short checklist to evaluate the mockup:
- Visual match with surroundings
- Structural stability and alignment
- Surface drainage flow
- Ease of installation
Document any adjustments before full-scale construction begins.
Build Sequence, Punch List, And Care Plan
Outline the build sequence in writing. Include excavation, base preparation, drainage installation, wall stacking, backfilling, and topsoil replacement. Assign clear responsibilities if multiple contractors are involved.
Maintain a punch list of final details—lighting placement, step alignment, edge trimming, and soil compaction checks. Inspect each item before signing off.
Develop a care plan for long-term upkeep. Schedule seasonal inspections for cracks, bulging, or drainage clogs. Clean weep holes and remove plant roots near joints. Keeping a maintenance log helps you track performance and extend the wall’s lifespan.