Artificial turf installation might seem straightforward, but numerous homeowners encounter costly problems that could have been easily prevented. Poor ground preparation, incorrect base materials, and improper seaming techniques are just a few issues that can compromise your investment and leave you with an unsatisfactory result.
The most common installation mistakes stem from rushing through critical preparation steps and overlooking technical requirements that ensure long-term durability. These errors often lead to drainage problems, uneven surfaces, visible seams, and premature wear that defeats the purpose of choosing low-maintenance synthetic grass.
Understanding these pitfalls before you begin your project can save you significant time, money, and frustration. Whether you’re considering a DIY approach or evaluating professional installation options, knowing what can go wrong helps you make informed decisions about your outdoor space transformation.
Mistake #1: Skipping Proper Ground Preparation
Inadequate ground preparation leads to uneven surfaces, poor drainage, and premature turf failure. These foundation issues create visible problems and reduce the lifespan of your artificial grass installation.
Why Base Preparation Is Critical
Your artificial turf requires a stable, level foundation to perform properly. Without adequate base preparation, you create problems that become expensive to fix later.
The ground preparation process involves several key steps. You must remove all existing vegetation, rocks, and debris from the installation area. Failing to clear organic materials allows decomposition beneath your turf, creating soft spots and uneven areas.
Proper base materials include:
- Crushed granite or decomposed granite
- Class II road base
- Sand (for specific drainage needs)
You need to excavate 2-4 inches of soil depending on your existing ground conditions. Compact the base material in thin lifts using a plate compactor. Each lift should be approximately 1-2 inches thick before compaction.
Weed barrier installation prevents future vegetation growth. Install the barrier after base preparation but before laying turf. This step eliminates weeds that can push through seams and create unsightly bumps.
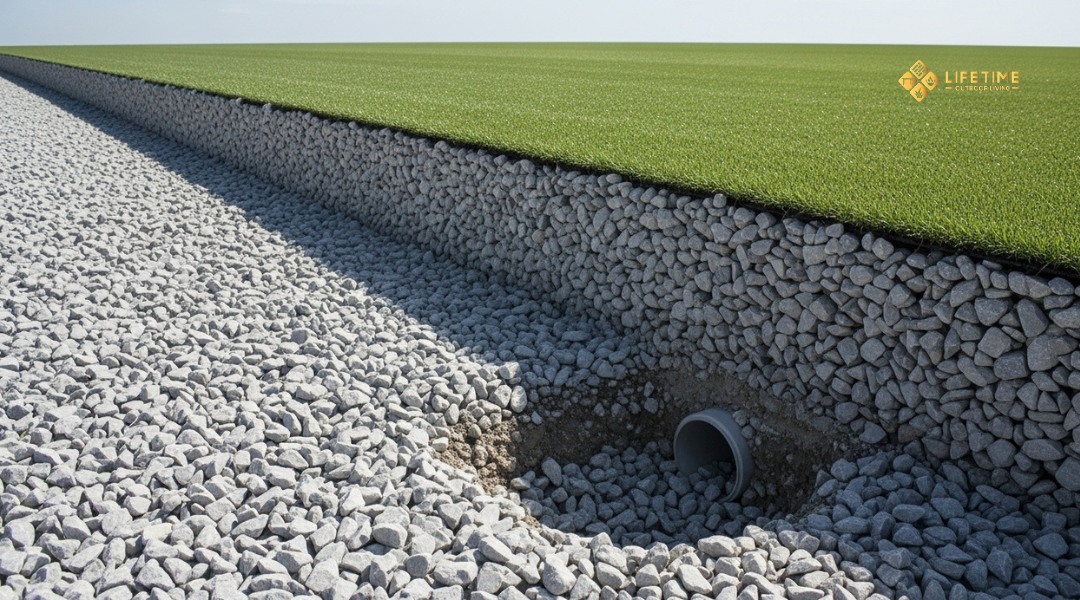
Issues Caused by Poor Drainage or Uneven Surfaces
Poor drainage creates standing water that damages your turf and creates unpleasant odors. Water pooling occurs when the base lacks proper slope or uses inappropriate materials.
Your installation requires a minimum slope of 1% for adequate drainage. This translates to a 1-inch drop for every 100 inches of horizontal distance. Steeper slopes up to 3% work better for heavy rainfall areas.
Uneven surfaces cause multiple problems with your turf. Common issues include:
- Visible wrinkles and bunching
- Premature wear at high spots
- Water pooling in low areas
- Separation at seams
These surface irregularities become more pronounced over time. Foot traffic and weather conditions worsen the appearance of improperly prepared installations.
Your turf will shift and move on unstable surfaces. This movement creates gaps between sections and allows debris to accumulate underneath. The resulting appearance looks unprofessional and requires costly repairs.
Mistake #2: Using the Wrong Base Materials
The foundation beneath your artificial turf determines its longevity and performance. Many installers choose inappropriate base materials like soil or sand, which lead to drainage problems and surface instability.
Common Errors (e.g., Using Soil Instead of Crushed Rock)
Using existing soil as a base creates multiple problems. Soil retains water and becomes muddy during rain. This leads to uneven surfaces and poor drainage.
Sand is another problematic choice. It shifts over time and doesn’t provide stable support. Your turf will develop low spots and bumps.
Clay-based soils are particularly troublesome. They expand when wet and contract when dry. This movement causes ripples and waves in your artificial grass.
Some installers use decomposed granite thinking it’s adequate. While better than soil, it lacks the drainage properties of proper base materials. Water pools beneath the turf instead of flowing away.
Using the wrong materials also affects turf performance. Your artificial grass may feel spongy or unstable underfoot. Seams can separate when the base shifts.
The Right Base for Durability and Drainage
Crushed rock aggregate forms the ideal base material. Use ¼-inch minus crushed rock for optimal results. This material contains fine particles that compact well while maintaining drainage.
The base should be 3-4 inches deep for residential installations. Commercial areas may require deeper bases. Compact the material in 2-inch lifts using a plate compactor.
Proper base materials include:
- ¼-inch minus crushed rock
- Decomposed granite (as secondary option)
- Road base aggregate
- Crusher run limestone
Avoid these materials:
- Native soil
- Pure sand
- Organic matter
- Clay-heavy soils
Grade the base with a 1-2% slope away from structures. This ensures water flows properly and prevents pooling. Install edge restraints before adding base material to maintain proper boundaries.
Compact the base to 95% density. Use a plate compactor and water lightly during compaction. Test firmness by walking across the surface – it should feel solid without movement.
Mistake #3: Incorrect Seaming and Joining
Poor seaming techniques create visible lines that destroy the natural grass appearance. Misaligned grain direction and uneven cuts produce noticeable gaps that collect debris and allow weeds to grow.
Visible Seams That Ruin the Look
Visible seams occur when turf pieces don’t align properly at their joining points. The most common cause is mismatched grain direction between adjacent sections.
Grain direction misalignment creates an obvious visual break. When fibers lean in different directions, they reflect light differently and create a stripe effect across your lawn.
Uneven cuts leave gaps between turf pieces. These spaces expose the base material underneath and create pathways for weeds. Professional installers use sharp utility knives to create clean, straight edges.
Poor edge preparation compounds seaming problems. Frayed or crushed fiber edges don’t join cleanly. You must trim damaged fibers before attempting to connect pieces.
Temperature affects seaming quality. Installing turf in extreme heat causes expansion, while cold weather leads to contraction. Both conditions make achieving tight seams more difficult.
Best Practices for Seamless Turf Connections
Match grain direction before cutting or positioning turf pieces. Lay sections side by side and observe fiber direction under natural light. All fibers should lean the same way.
Use proper cutting techniques for clean edges. Cut from the backing side using a sharp utility knife. Replace blades frequently to maintain cutting precision.
Install seaming tape correctly by placing it underneath the joint. Apply turf adhesive evenly across the tape surface. Press turf edges firmly onto the adhesive while it’s still tacky.
Butt edges tightly without overlapping. Leave no gaps but avoid forcing pieces together, which can create buckling. The connection should be snug but not strained.
Brush seam areas after installation to blend fibers naturally. Use a stiff broom to work fibers across the joint line and eliminate visible boundaries.
Mistake #4: Not Securing the Turf Properly
Inadequate anchoring leads to wrinkles, bubbling, and premature wear that compromises your lawn’s appearance and longevity. Proper securing techniques prevent movement and ensure your artificial turf remains flat and stable for years.
Problems with Turf Shifting or Lifting
Edge separation is the most visible sign of poor turf securing. When perimeter edges aren’t anchored properly, they curl upward and create obvious seams between turf sections.
Bubble formation occurs when insufficient fastening allows air pockets to develop beneath the surface. These bubbles expand during hot weather and create uneven walking surfaces.
Inadequately secured turf shifts during heavy foot traffic or severe weather. This movement stretches the material and causes permanent deformation at stress points.
Premature wear patterns develop along loose edges where the turf rubs against itself. These high-friction areas fade quickly and require costly section replacements.
Water infiltration increases dramatically when edges lift or separate. Moisture penetrates the base material and creates drainage problems that affect the entire installation.
Tools and Techniques for Proper Anchoring
Galvanized landscape nails provide the strongest hold for most installations. Use 6-inch nails spaced every 6-8 inches along all perimeters and seams.
Adhesive strips work best for concrete or asphalt surfaces where nails cannot penetrate. Apply outdoor turf adhesive in continuous beads along all edges.
Weighted edges using decomposed granite or sand help secure perimeters without visible fasteners. Pack material firmly against turf edges to prevent lifting.
Install nails at a slight angle toward the turf center rather than straight down. This technique creates better holding power and reduces nail visibility.
Double-secure high-traffic areas by combining nails with adhesive for maximum stability. Pay special attention to walkways and play areas where movement stress is highest.
Mistake #5: Forgetting About Edging and Finishing Touches
Proper edging creates clean boundaries and prevents turf movement over time. Quality infill distribution ensures your artificial grass looks natural and maintains structural integrity.
Why Edging Prevents Fraying and Shifting
Edge restraints anchor your artificial turf and maintain sharp, defined borders. Without proper edging, grass blades separate at seams and create unsightly gaps.
Metal edging strips provide the strongest hold for high-traffic areas. Install them flush with the soil surface to avoid tripping hazards.
Plastic edging works well for curved installations and lighter foot traffic. Secure every 12-18 inches with landscape spikes.
Your turf edges will lift and curl without restraints. This exposes the backing material and creates entry points for weeds and debris.
Proper installation depth matters. Bury edging 2-3 inches deep with at least 1 inch above ground. This prevents frost heave and maintains stability.
Hammer spikes completely flush to avoid puncturing the turf backing. Leave no gaps between edging sections to maintain continuous support.
Importance of Infill for Realism and Stability
Infill weighs down turf fibers and helps grass blades stand upright. This creates a natural appearance and prevents matting under foot traffic.
Silica sand provides basic weight and drainage. Apply 1-2 pounds per square foot depending on pile height.
Crumb rubber adds cushioning and resilience. Mix with sand at a 70/30 sand-to-rubber ratio for optimal performance.
Organic infills like cork or coconut fiber stay cooler in summer heat. These cost more but provide superior comfort.
Spread infill evenly using a drop spreader or broadcast spreader. Work material deep into fibers with a stiff brush.
Installation timing affects results. Apply infill during dry conditions to prevent clumping and ensure uniform distribution.
Your artificial grass will look flat and artificial without adequate infill. Proper application creates the bounce and texture of natural grass.
Additional Mistakes to Avoid
Many installation failures stem from cutting corners on material quality and overlooking local environmental factors. Coastal California’s unique climate presents specific challenges that require proper planning and material selection.
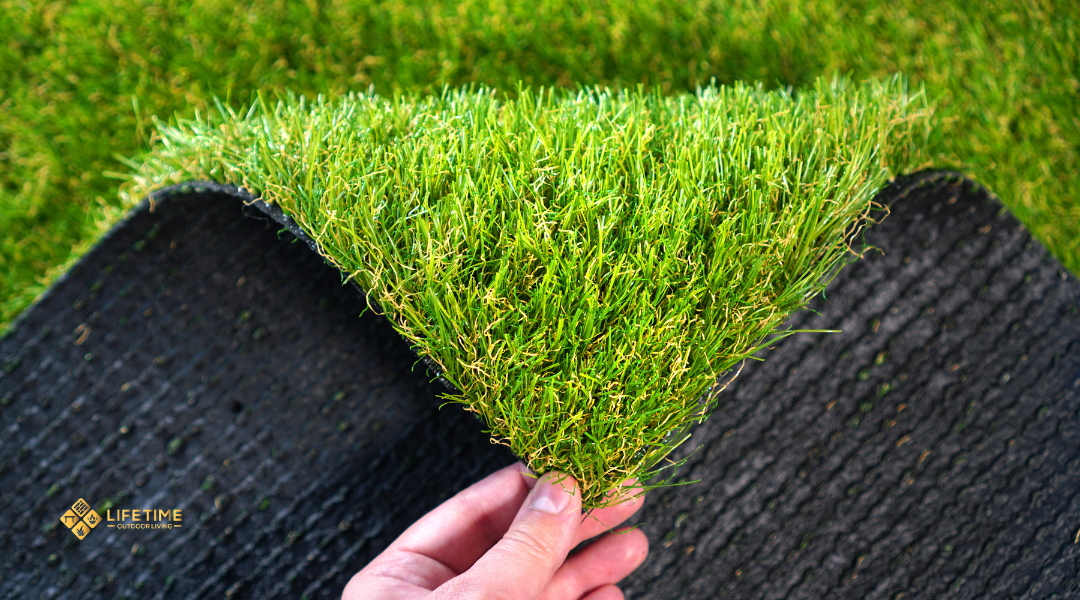
Choosing Low-Quality Turf to Save Money
Low-grade artificial turf may cost 30-50% less upfront but creates expensive problems within 2-3 years. Cheap turf typically uses thin backing materials that tear easily and sparse pile density that creates bare patches.
Key quality indicators include:
- Backing weight of at least 12 ounces per square yard
- Face weight between 50-90 ounces per square yard
- UV stability rating of 8+ years
Inferior turf loses color quickly under sun exposure. The fibers become brittle and break off, leaving your lawn looking patchy and worn.
Budget turf often lacks proper drainage holes. This causes water pooling and potential mold growth underneath the surface.
Quality turf includes antimicrobial treatments and lead-free materials. Cheap alternatives may contain harmful chemicals or lack these protective features entirely.
Ignoring Climate Considerations in Coastal California
Coastal California’s salt air requires specific turf materials and installation techniques. Standard inland methods often fail within months near the ocean.
Salt exposure corrodes metal components like nails and staples. Use marine-grade stainless steel fasteners instead of standard galvanized materials.
Morning marine layer creates persistent moisture conditions. Your base preparation must include enhanced drainage layers with 4-6 inches of decomposed granite rather than the standard 2-3 inches.
Cool ocean temperatures mean different expansion rates for turf materials. Leave slightly larger expansion gaps at seams to prevent buckling during warmer inland temperature spikes.
Coastal winds carry sand and debris that accumulate faster than inland areas. Choose turf with tighter weave patterns and shorter pile heights for easier maintenance.
Benefits of Professional Artificial Turf Installation
Professional installation prevents costly errors that can compromise your turf’s durability and appearance. Expert installers provide warranties and specialized knowledge that protect your investment over time.
Long-Term Cost Savings from Avoiding Mistakes
Professional installers eliminate expensive repair costs by getting the installation right the first time. Common DIY errors like improper drainage, inadequate base preparation, and incorrect seaming can cost thousands to fix later.
Poor drainage leads to water pooling and turf lifting. This requires complete re-installation in affected areas, often costing 60-80% of the original project price.
Inadequate base compaction causes uneven surfaces and premature wear. Professionals use specialized equipment to achieve proper compaction levels that DIY installers cannot match.
Incorrect measurements waste materials and create costly delays. Professional teams accurately calculate turf quantities and account for waste factors, preventing expensive material shortages or overages.
Seaming errors create visible lines and premature separation. Expert installers use proper adhesives and techniques that maintain invisible seams for years.
Lifetime Outdoor Living’s Expertise and Warranty
Lifetime Outdoor Living brings specialized knowledge gained from hundreds of installations. Their certified installers understand soil conditions, drainage requirements, and local climate factors that affect turf performance.
The company provides comprehensive warranties covering both materials and workmanship. This protection includes turf defects, installation errors, and premature wear under normal use conditions.
Their expertise includes proper base selection for different soil types and drainage solutions for challenging terrain. They also handle permit requirements and HOA approvals when necessary.
Professional-grade tools ensure precise cutting, proper seaming, and adequate compaction. These specialized equipment investments are not cost-effective for single DIY projects.
Post-installation support includes maintenance guidance and warranty service calls. This ongoing relationship protects your investment long after completion.